This post will present a step-by-step process to convert C++/C++11 Makefile-based projects to Xcode build tools. I use it all the time to set up, convert, build and debug Unix/Linux executables that I develop on my Macintosh.
Context and Benefits
I write a lot of concurrent, complex, real-time C++11 code these days using my Macintosh. I prefer the look, feel, tools and services that the Macintosh and its ecosystem provides.
But the applications I build all run on Linux CentOS 6.6 Servers.
I could do this development on a Linux desktop, as a lot of people do. The tools exist and the Linux desktop sure is maturing. But, in my opinion, the OS X tools, third party productivity products, robustness, ecosystem and my habits make me far more productive on OS X. I can leverage Xcode and its amazing compilers, debuggers and IDE tools to help me build better C++11 products quicker, and then deploy using git and make to Linux. Since I use only clean C++11 and open source dependencies, all available via HomeBrew, this model works great.
Xcode provides an amazing set of tools over and above the code editor. The integrated clang compiler detects far more potential issues than others. The integrated llvm debugger and inspectors make it easy to view the content of objects at breakpoints. The thread, memory and networking panels show exactly what the program is doing and Instruments is pure wizardry. There is no reason not to take advantage of all of these robust and easy to use technologies when developing.
An Example C++ Makefile with Dependencies
Lets start with a real Makefile I use for a semi-complex product with many dependencies. Its a long Makefile, but I’ll go though the highlights below.
#
#  Makefile
#  CoralSeaServer
#
#  Created by Hilton Lipschitz on 2014-10-20.
#  Copyright (c) 2014 Maritime Capital LP. All rights reserved.
#

# HIL: No spaces or comments after otherwise it captures them!
# Determine the platform
UNAME_S := $(shell uname -s)

ifeq ($(UNAME_S),Darwin)
	CC := clang++ -arch x86_64
else
	CC := g++
endif

SRCDIR := src
LIBDIR := lib
BUILDDIR := build
TARGETDIR := bin
INSTALLBINDIR := /usr/local/bin
TARGET := bin/CoralSeaServer

# Normal CPP files
SRCEXT := cpp
SOURCES := $(shell find $(SRCDIR) -type f -name *.$(SRCEXT))
OBJECTS := $(patsubst $(SRCDIR)/%,$(BUILDDIR)/%,$(SOURCES:.$(SRCEXT)=.o))

# Protobuf CC files
SRCEXT2 := cc
SOURCES2 := $(shell find $(SRCDIR)/proto -type f -name *.$(SRCEXT2))
OBJECTS2 := $(patsubst $(SRCDIR)/%,$(BUILDDIR)/%,$(SOURCES2:.$(SRCEXT2)=.o))

CFLAGS := -c
ifeq ($(UNAME_S),Linux)
	CFLAGS += -std=gnu++11 -O2 # -fPIC
else
	CFLAGS += -std=c++11 -stdlib=libc++ -O2
endif

LIB := -L /usr/local/lib -lcorinth -lprotobuf -lzmq
INC := -I include -I include/proto -I /usr/local/include

$(TARGET): $(OBJECTS) $(OBJECTS2)
	@mkdir -p $(TARGETDIR)
	@echo " Linking..."
	@echo " $(CC) $^ -o $(TARGET) $(LIB)"; $(CC) $^ -o $(TARGET) $(LIB)

$(BUILDDIR)/%.o: $(SRCDIR)/%.$(SRCEXT)
	@mkdir -p $(BUILDDIR)
	@echo " $(CC) $(CFLAGS) $(INC) -c -o $@ $<"; $(CC) $(CFLAGS) $(INC) -c -o $@ $<

$(BUILDDIR)/proto/%.o: $(SRCDIR)/proto/%.$(SRCEXT2)
	@mkdir -p $(BUILDDIR)
	@mkdir -p $(BUILDDIR)/proto
	@echo " $(CC) $(CFLAGS) $(INC) -c -o $@ $<"; $(CC) $(CFLAGS) $(INC) -c -o $@ $<

clean:
	@echo " Cleaning...";
	@echo " $(RM) -r $(BUILDDIR) $(TARGET)"; $(RM) -r $(BUILDDIR) $(TARGET)

install:
	@echo " Installing...";
	@echo " cp $(TARGET) $(INSTALLBINDIR)"; cp $(TARGET) $(INSTALLBINDIR)

distclean:
	@echo " Un-Installing...";
	@echo " rm /usr/local/bin/CoralSeaServer"; rm /usr/local/bin/CoralSeaServer

.PHONY: clean
Since this is a multi-platform Makefile, I determine the platform on line 11. Lines 13 to 17 then select the compiler, clang for OS X and g++ for Linux. Lines 37 to 41 set the platform specific compiler flags. Everything else is the same for all platforms.
Also, note line 43, this product has three dependencies, libraries called corinth (my common code), protobuf (Google’s protocol buffers) and zmq (ZeroMQ). These are installed in OS X using HomeBrew and on Linux using yum or the standard source distributions. All third party libraries on my OS X development box and in CentOS are in /usr/local.
To build this product on any supported platform, I just type the command:
make clean; make -j 8
To install the product:
sudo make install
Note: On OS X I do not use sudo for installs.
Building the Xcode Project
We will go through several steps to build the Xcode project:
- Create the Xcode Project file (and then move it)
- Add existing project files to the project
- Remove unnecessary Target Memberships
- Add
/usr/local/..to searches - Select the libraries to link in (and create a
libgroup) - Live long and prosper
Creating the Xcode Project
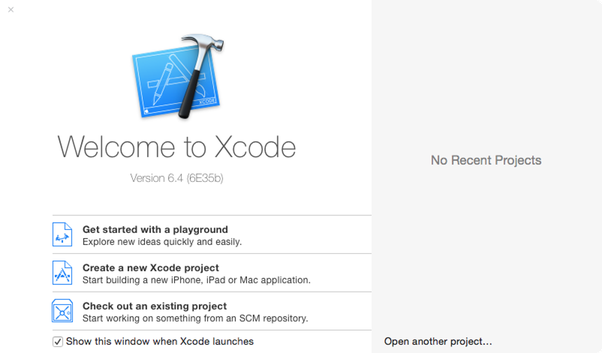
Launch Xcode and select Create a new Xcode project.
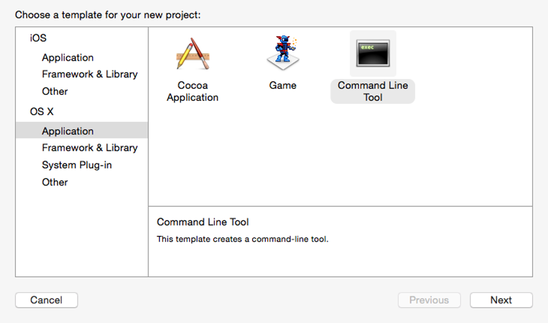
Choose Command Line Tool under OS X / Application. Click Next.
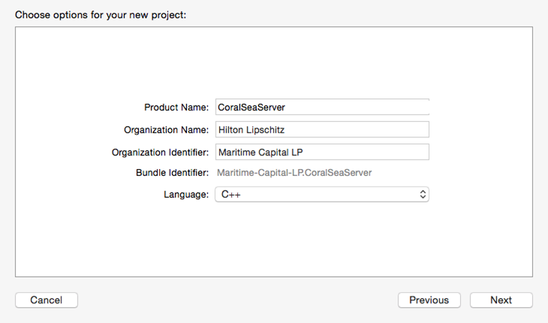
Type in the Project Name (I use the name of the executable) and make sure that you choose a C++ project. Click Next.
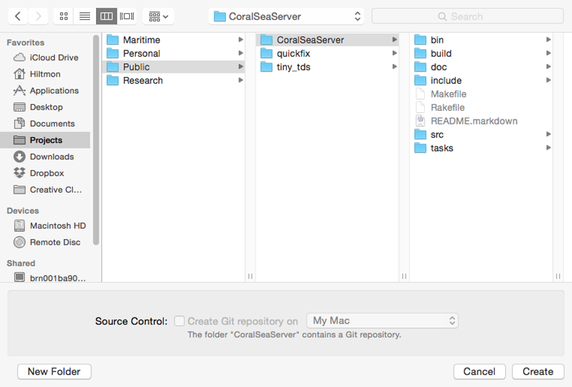
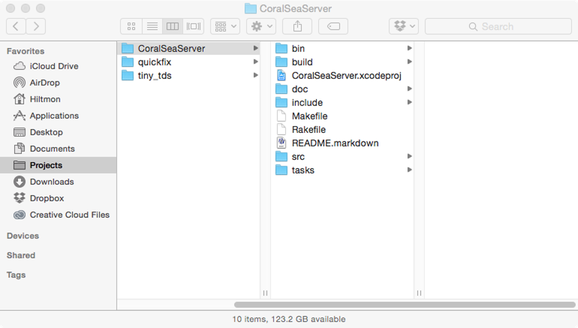
Save the new project file in the root of the project folder (the same place the Makefile is). Click Create.
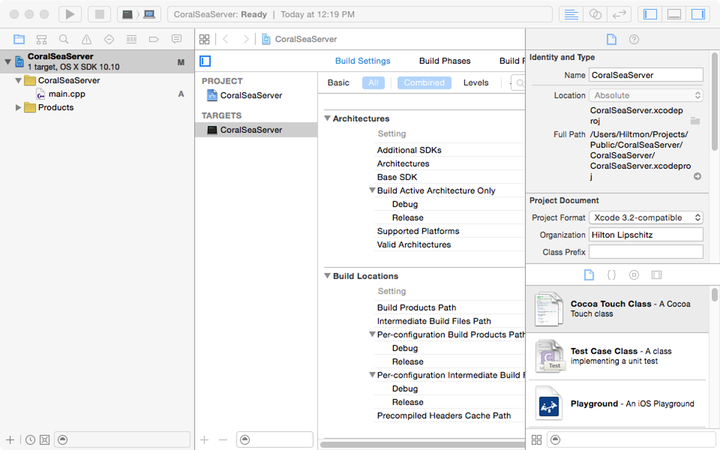
The basic project should look like this (no source files have been added yet).
Right-click on project (in this case CoralSeaServer) in the left pane and choose Show in Finder
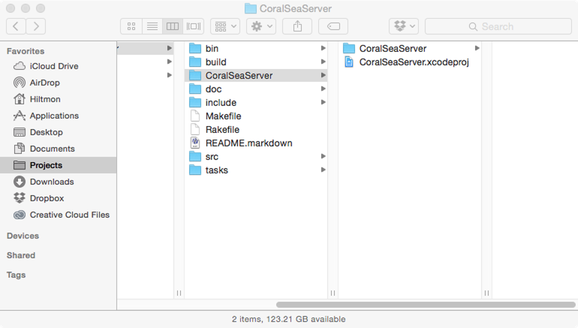
Unfortunately, Xcode has created a new folder inside the project folder and placed the .xcodeproj file inside that. We need it at the same level as the Makefile. It has also created its own code folder and a new main.cpp which we no longer need. Here is how to fix it (the project file trick):
- Quit Xcode, we’re going to move things around in the Finder.
- In Finder, drag and drop the
.xcodeprojup a folder level to be in the same place as the Makefile.
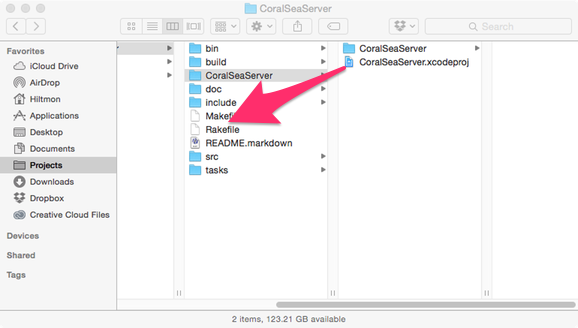
- Then, delete the project folder created by Xcode
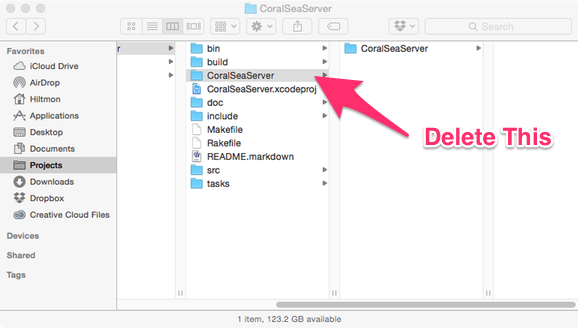
Resulting in a clean file system.
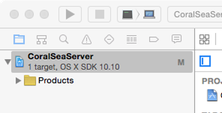
Double-click the .xcodeproj file to launch and open the project in Xcode. You will see the main.cpp is now in red, indicating that it does not exist. This is what we expect because we deleted Xcode’s created main.cpp in Finder. Right-click the group above the missing main.cpp and choose Delete. Your left pane should look something like the one on the right.
Add existing files to the Project
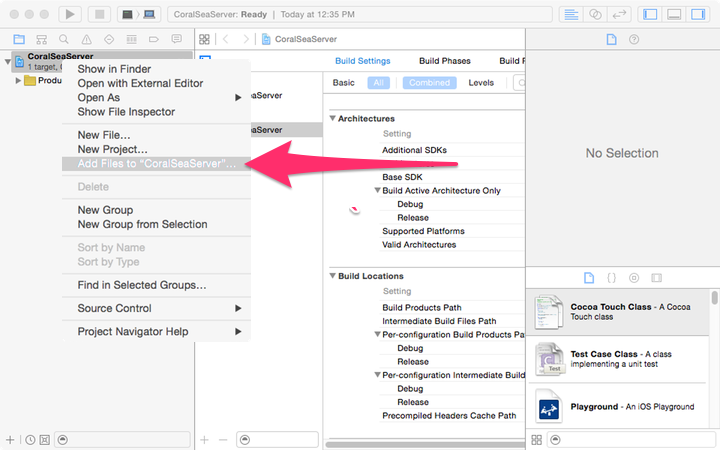
We now need to add the existing code files to the Xcode project so that it can compile and index them. Right-click on the project in the top-left and select Add files to “…”.
Select all files except the bin and build folders (if they exist). Make sure Create groups is selected and Add to targets refers to your new project. Click Add.
For more information on the folders and files I use, see A Simple C++ Project Structure.
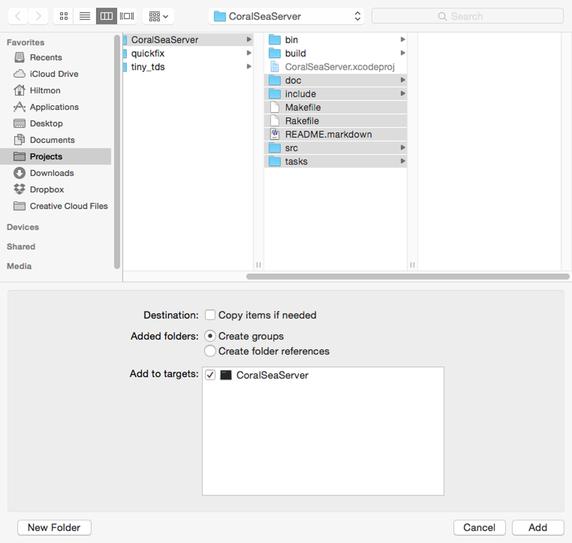
Xcode will create groups for the folders in the project.

Remove any unnecessary Target Memberships
By default, Xcode tries to compile every file (except headers) that you add. Since Makefiles and Markdown files cannot be compiled, you will get errors when you first try to build the application. This happens because we added all files to the target when importing above.
Select the Makefile and uncheck Target Membership. If this is not shown, click the top-right toolbar item to show it.
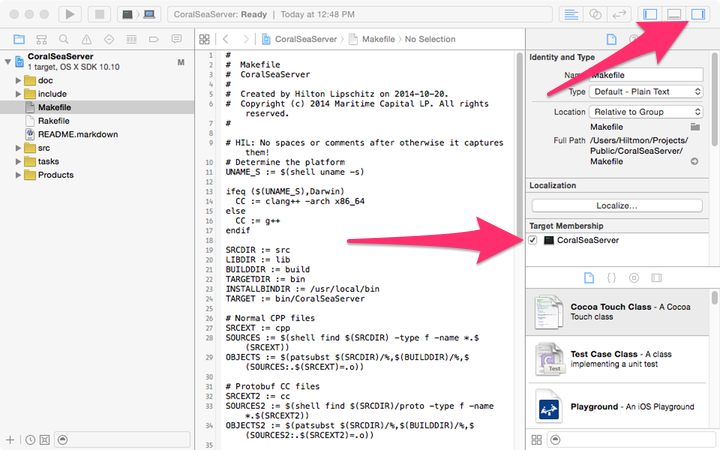
Repeat the uncheck for any other non-compilable files. In my case, that includes the README.markdown file. Do not remove any source-code files from the target or the project will not build.
Add /usr/local/... to searches
Since this C++11 project uses shared libraries, we need to tell the compiler where they are.
Select the Project in the top-left, and then the target. Then scroll down until you see Search Paths.
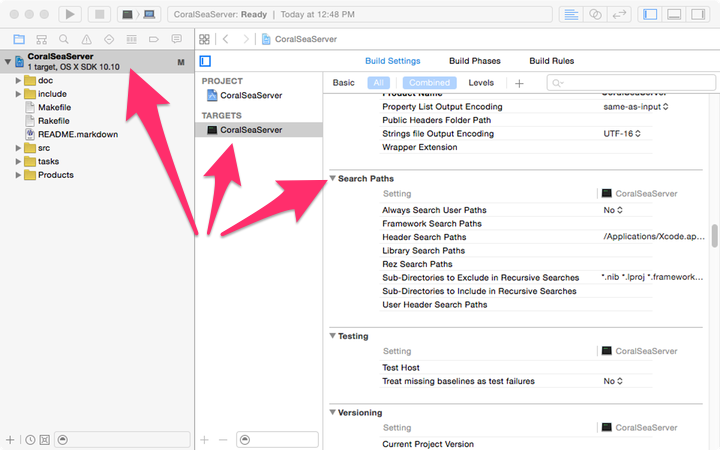
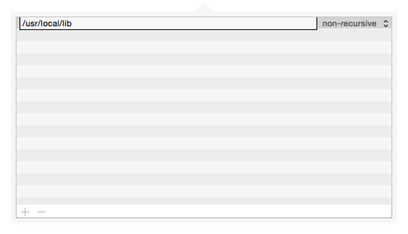
Double-click the column to the right of Header Search Paths. It brings up a panel of search paths.
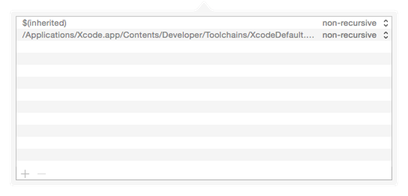
Click the + at the bottom to add a new search path and type in /usr/local/include. This tells the compiler to look for headers in the public tree.
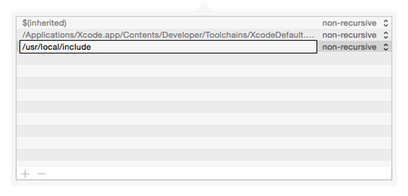
Double-click the column to the right of Library Search Paths. It brings up a panel of search paths. Add /usr/local/lib to tell the compiler where to find the shared libraries.
Choose the Libraries to be linked
Now we need to add the libraries that are included in Line 43 of the Makefile to the compilation.
LIB := -L /usr/local/lib -lcorinth -lprotobuf -lzmq
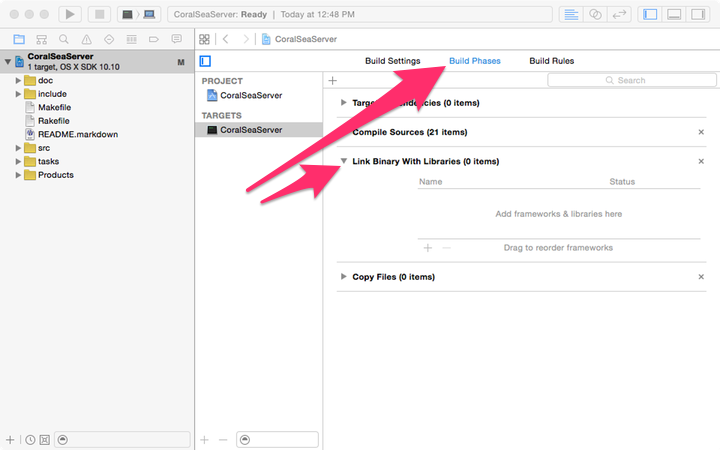
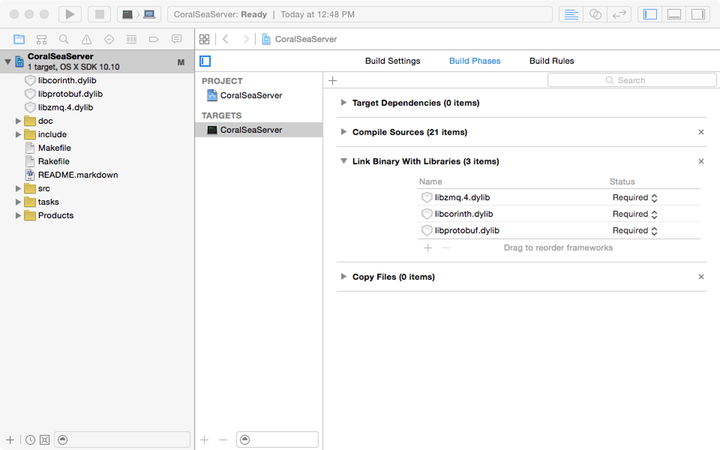
Click Build Phases and then expand Link Binary With Libraries.
There are 2 ways to add libraries, drag and drop from finder or manual add.
EITHER Drag and Drop from Finder
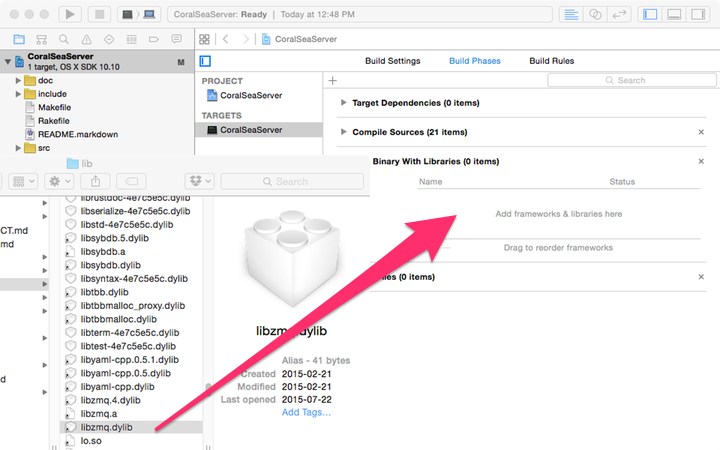
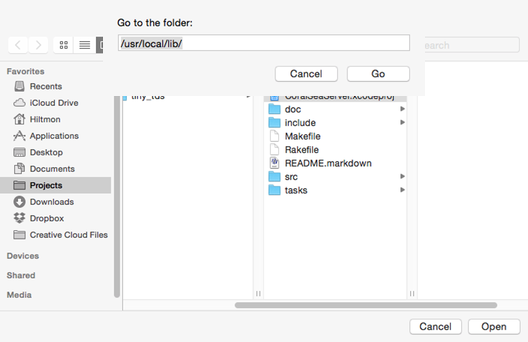
Open a Finder window and press ⌘⇧G (Command-Shift-G) or select Go / Go to Folder… from the menu. Type in /usr/local/lib/ to select the public libraries folder.

Drag and drop the libraries you need into the space called Add frameworks and libraries here.
Tip: Libraries in UNIX are named libxxx.dylib where xxx is the same name as the -l in the makefile. So, in my makefile I have a -lzmq, then the library to drag over will be named libzmq.dylib. There may be other names, extensions and versions, do not drag these over. Only drag over the plain one. Xcode will add the correct and latest version to your project.
Repeat for all the libraries in the Makefile.
OR Manually Add Libraries
Click the + below Add frameworks and libraries here. Choose Add Other….
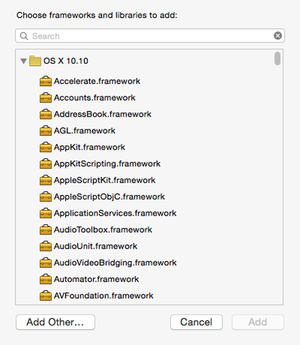
This brings up a standard OS X Open Sheet. Here’s the trick: press ⌘⇧G (Command-Shift-G) to access the hidden Go to Folder window. Type in /usr/local/lib/ and click Open.
Select the library file you want to add. Since I am adding the file for -lzmq, I add libzmq.dylib. Click Open.
Repeat for all the libraries in the Makefile.
Create a lib group
After adding all the libraries, your list of libraries to link should match the Makefile.
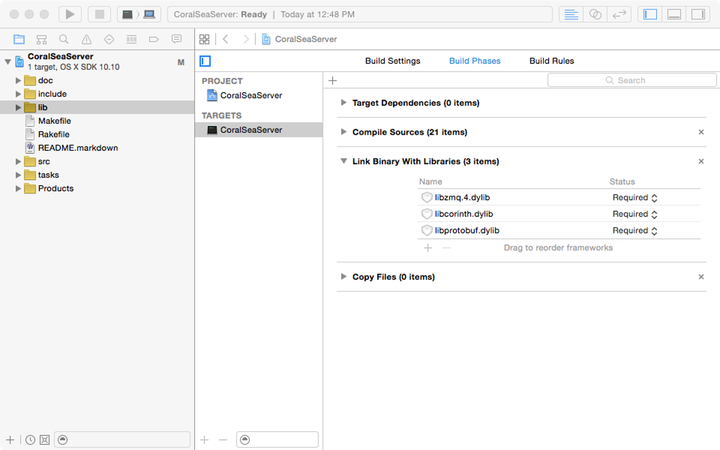
Select all the lib files in the left-hand pane, then right-click and choose New Group from Selection. Type lib to create a nice lib group and drag it down the project. I do this to keep the left-hand pane clean.
Build and Run
We have created an Xcode project, added the source files, removed unnecessary target memberships, added search paths and link libraries, so we’re ready to build and run.
Hit ⌘B or click the Xcode run arrow.
The project should compile and run.
What if it does not Compile and Run
Check the following:
- You added all the sources needed
- You typed in the search paths properly
- You added all the dependent libraries
- Most Makefiles do not include all the project include files and rely on the programmer to know where each header is. The programmer then has to add paths to internal includes. Xcode (and good Makefiles) do not need this. If you see an error on a
#include "this/that.h", replace it with#include "that.h"and fix the Makefile (see re-testing the Makefile below on how). - Read the
clangerror (not warning) messages, they will tell you what went wrong and what needs to change.
Re-testing the Makefile
The project is now building in Xcode and you gain all the benefits of the Xcode ecosystem. But it is worth checking that the Makefile version still works, especially if you have made code changes.
Open a terminal, cd to the project folder and:
make clean; make -j 8
If all is well, the project will compile as well.
If it does not compile, chances are you changed #include paths. Add the missing include paths as per my line 44:
INC := -I include -I include/proto -I /usr/local/include
Live Long and Prosper
You now have a C++ project that compiles both ways, from a Makefile and via the Xcode build system and get the best of both worlds:
- The Makefile version works cross platform and can be used for production deploys.
- The Xcode build system gives you access to IDE error checking, inspection, monitors and Instruments.
For more C++ articles, see my C++ Category.
Enjoy
Follow the author as @hiltmon on Twitter.